Folded Airplane Die Set Valentines
Happy Monday!
I hope your morning is off to a great start. I'm excited for this week as I'm *hoping* to put up a new post here everyday featuring different items from my new release! Definitely going to be a challenge so make sure to keep me accountable. *wink wink*
Today I'm sharing a ton of different designs using the Folded Airplane Die Set. I'm absolutely obsessed with this die and all the additional elements. It's definitely a fun one perfect for love notes.
Let's get started...
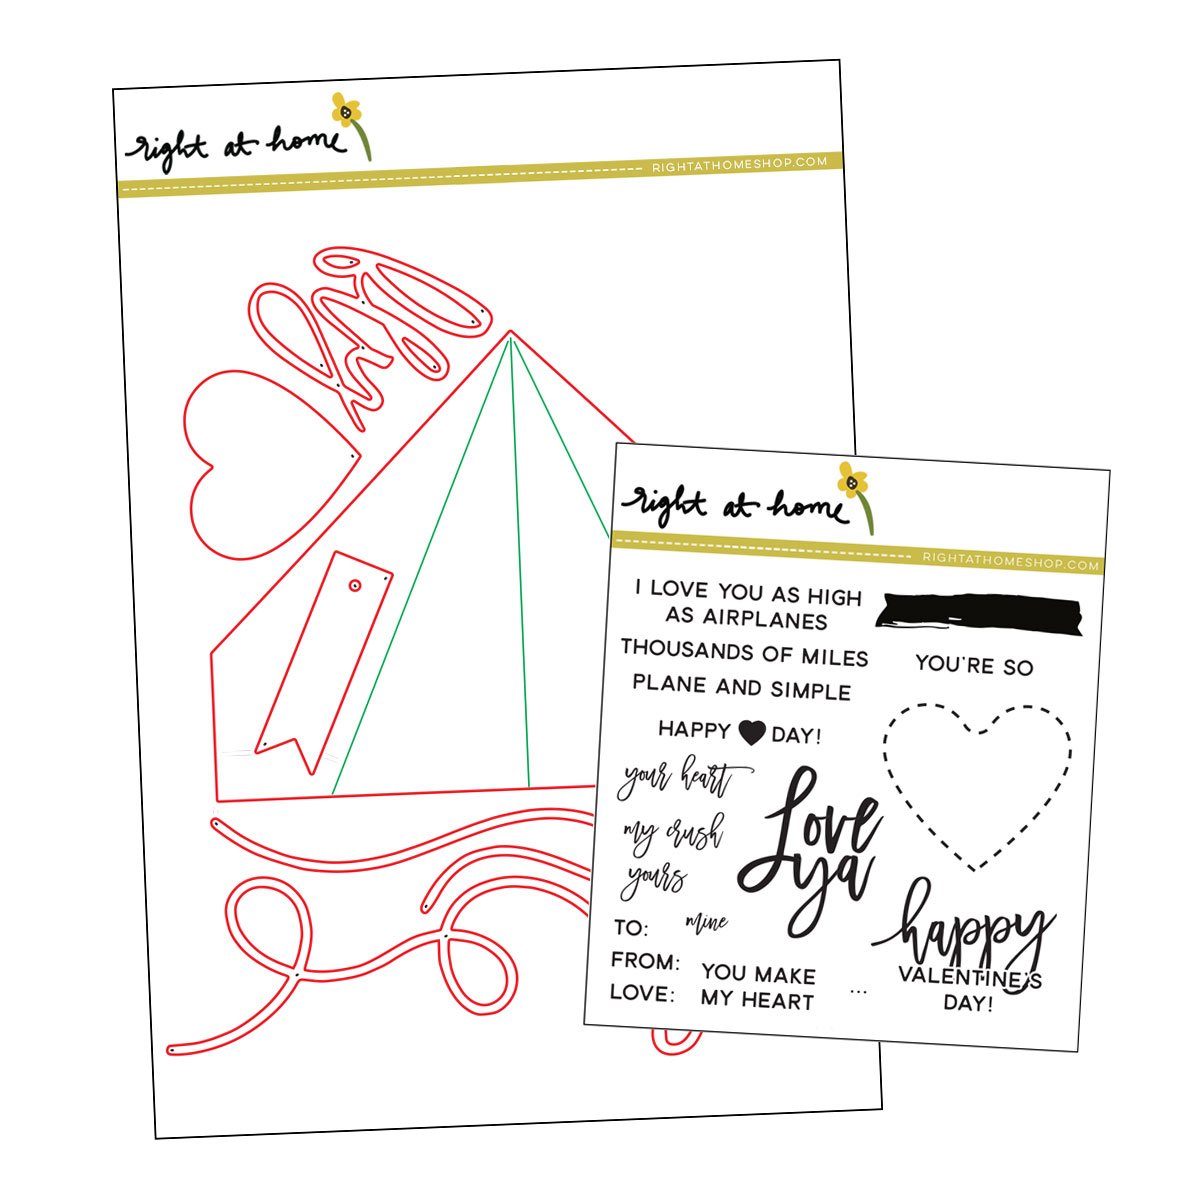
All of the paper airplanes shown were cut out of textured, white cardstock. The airplane die cuts the shape and scores three lines. Fold along the center line first, then move on to the two sides.
You make my heart SOAR...
For my first plane I wanted to start out with the "soar" die-cut. The font is just so beautiful. I cut it from some Bristol Smooth cardstock and inked it up with Peacock Feathers Distress Oxide Ink. This shade of blue is the perfect contrast to the pink and red tones. I did also die-cut a few extra from plain white cardstock to layer behind the inked one to add dimension. To complete the sentiment, I stamped "you make my heart" towards the top of the plane. I folded the airplane flat and centered the sentiment. I did have to double stamp as the crease in the center gets in the way. For the "thousands of miles" sentiment I used the little tag die included in the set. I inked it with Worn Lipstick Distress Oxide Ink and ran it through my die-cutting machine twice, flipping the "V" edge in between each pass. Next I inked a small piece of cardstock with Candied Apple and die-cut a heart.
Once all my pieces were done I adhered them to the plane. Make sure to only add adhesive to one side so that the plane can be opened! Inside I added the "plane and simple" sentiment and the "to" "from". I just love all the colors on this one!
I love you as high as airplanes FLY...
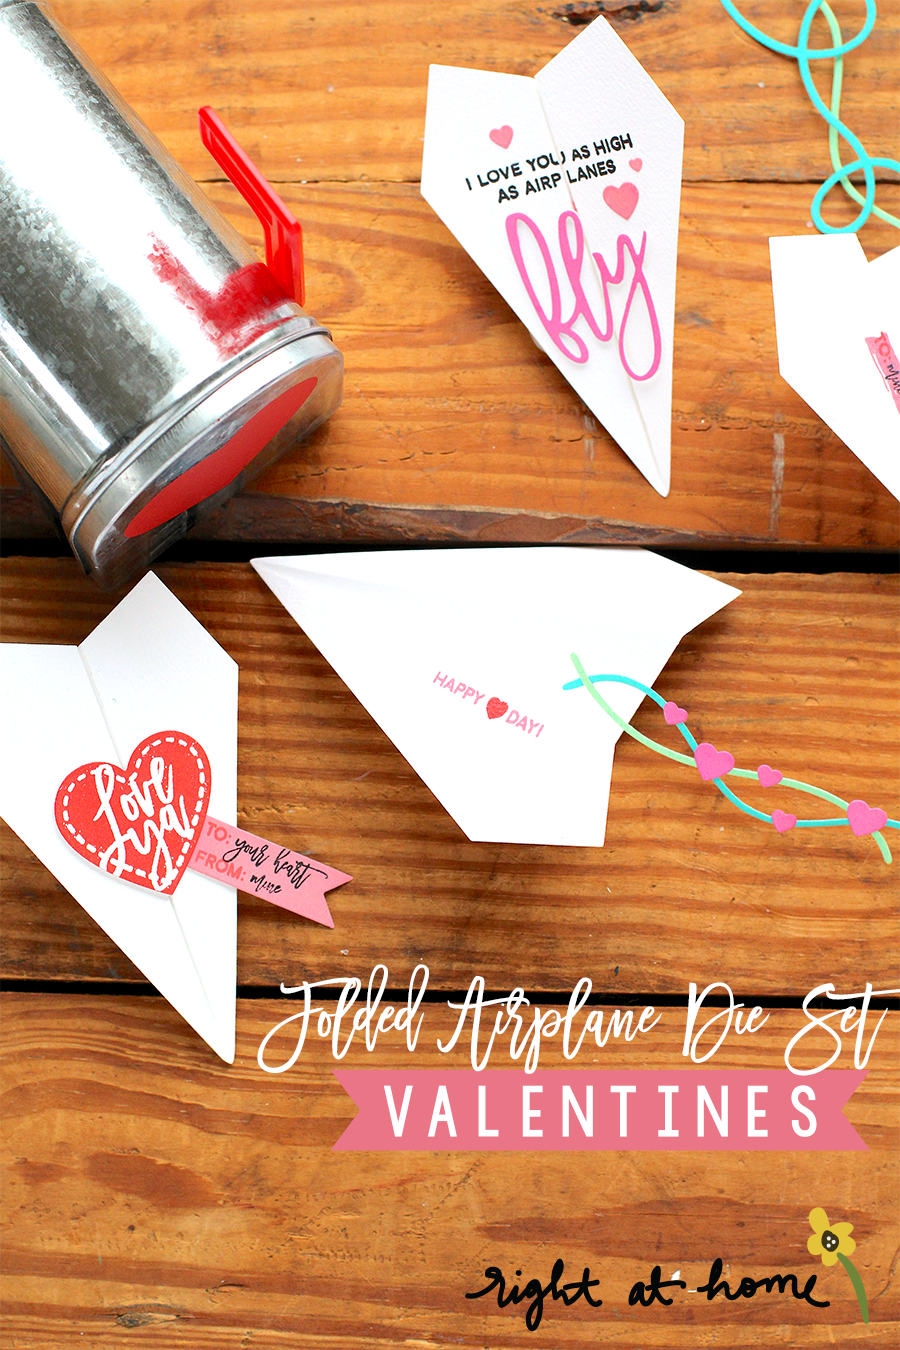
This next one is definitely a lot simpler yet still oh so cute. I did the same process for creating my "fly" sentiment instead this time I inked it with Picked Raspberry Distress Oxide Ink. Above the die-cut I stamped the coordinating sentiment. Again this is a bit tricky but if you use a stamp positioning tool you can stamp multiple times in the same position. Whatever doesn't transfer you can finish off with a black pen. Around the sentiment I added some little hearts included in the die set that I inked with Worn Lipstick.
Inside this one I stamped the "Happy Valentine's Day" and "love". Oh, and I added another heart!
Love ya...
For this plane I decided to put the heart die-cut and the coordinating stitching stamp from the Love Ya stamp set to use. I cut the heart from Bristol Smooth cardstock again and inked it with Candied Apple. Next I white heat-embossed both the stitching line and "love ya" sentiment. Behind the red heart I adhered two others die-cut from white cardstock to add dimension. For the tag I inked it with Worn Lipstick and stamped the "to" "from" as well as the "your heart" and "mine". I adhered it to the back of the heart at an angle so it kind of dangles off the plane.
I finished off this one by stamping the watercolor stripe and the "happy <3 day" sentiment inside. Underneath I simply stamped "love". I'm so smitten with all these little sentiments.
To: Mine, From: Yours...
These next two planes are suuuuper simple. I basically wanted to focus to be on the wind swirls behind the plane. This die set includes three different doodle swirls that you can layer to create movement behind your plane. I die-cut two of them for this one and inked them in either Peacock Feathers or Cracked Pistachio. For the front I just stamped the watercolor stripe and the "to" "mine" "from" "yours" sentiments.
Happy <3 Day!...
For my last plane I decided to use some creative masking. I pulled out the "happy <3 day" sentiment but wanted the heart to be a different color from the text. I started by covering the heart with tape and inking up the sentiment in Worn Lipstick. I removed the tape and stamped that onto the edge of my plane flap. I repeated the same process again, this time covering the text instead. I stamped the heart between the two words with Candied Apple. Again, I added two little doodle swirls to the inside of the plane allowing them to hang off the back. Along the swirls I also adhered a few hearts!
And those are all my planes...for now! I spent all day yesterday putting these together and I had a blast. Or should I say flight? Either way it was a great time.
These little love notes would be perfect for your sweet kiddos, loved ones, friends, coworkers, whoever you think needs a little love. Plus they're just oh so fun to play with!
Let me know which design is your favorite in the comments below!
Nicole
P.S. You can download my layering guide for this die set here to save all these ideas!


