
DIY Kraft Box Gift Wrap // Right at Home for the Hollydays Series
Besides the snow and cheer that comes along with the holiday season, my favorite part about this time of year is gift wrapping. If I must admit, sometimes I put more thought into how a gift is packaged than the actual gift itself, but that's the crafter in me, right? I'm sure you can relate.
This year is no different and I've already started putting together a few different ideas to share with you. In addition, I've partnered with my friend Holly from Holly Beary Creations to bring to you three days of gift wrap and DIY present ideas to make your holiday season a breeze. We're calling it Right at Home for the Hollydays and we couldn't be more excited. Now let's get started with Day #1!
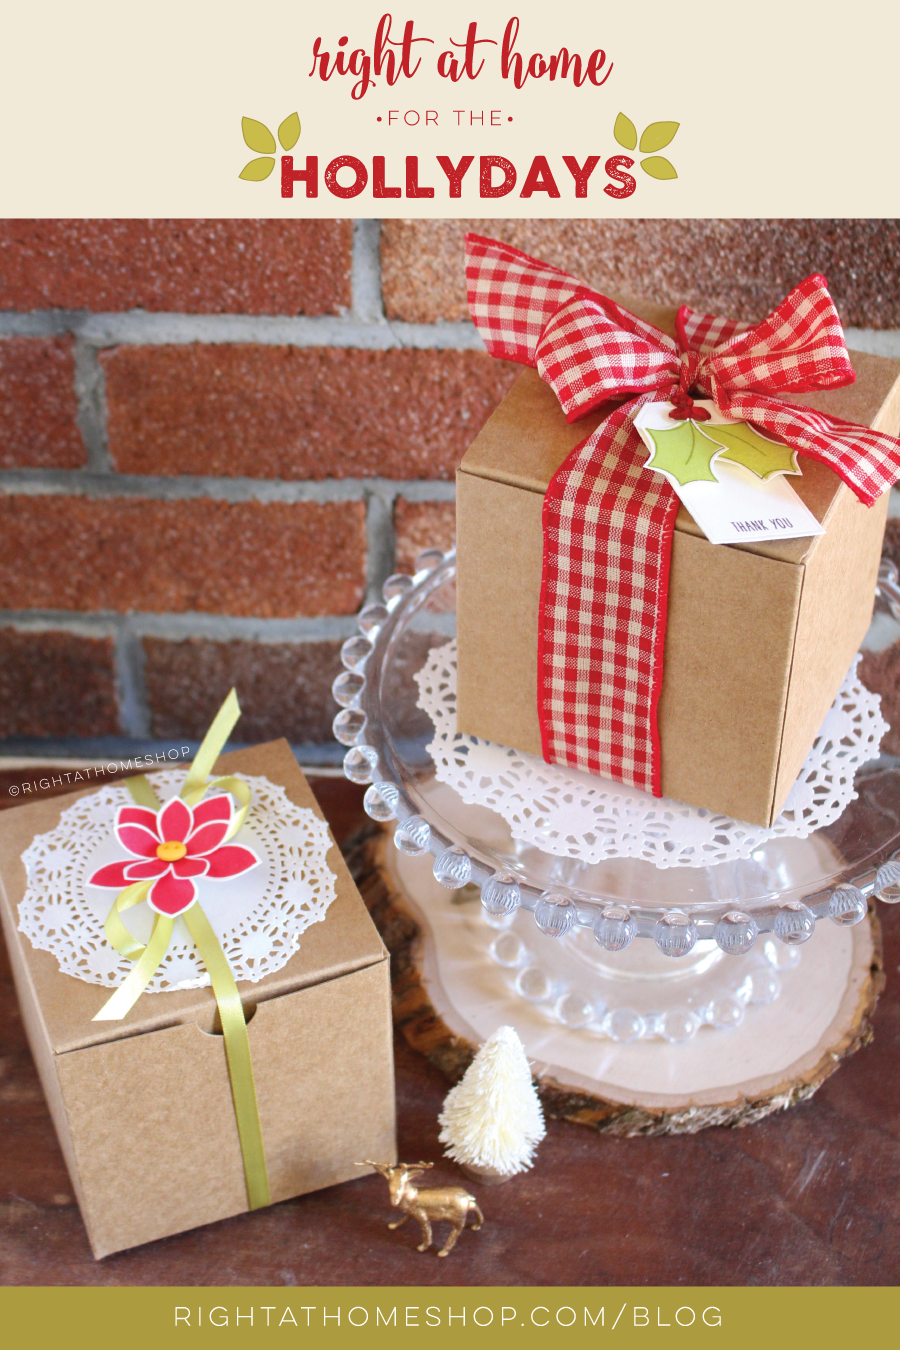
Holly Leaves Gift Box
I've had these 4 in x 4 in kraft got boxes lying around for forever and finally decided to use them for some gift wrap. Boxes like these are super easy to put together, they usually only take about 1-2 minutes. After my box was folded, I knew I wanted to use this big, red, plaid ribbon, so I tied a bow around the box. Next, I started working on the tag.

For my tag, I used some off-white cardstock and a MFT to cut out a small tag. To embellish it, I stamped my holly leaves from my Poinsettia stamp set in Sour Apple and Jellybean Green ink by MFT. I adhered them towards the top of the tag and added three red jewels to act as the berries. I used a small "thank you" stamp towards the bottom and adhered the tag under the knot of the bow.
Poinsettia Gift Box
For my next box, I started with the idea to use a doily on the top and tie some thin, green, ribbon around it. At that point I was kinda stuck, but then noticed that the bow I tied looked like leaves. I instantly knew how I wanted to finish off the box.

Using my Poinsettia set, I stamped the largest and smallest flower in red ink and trimmed them out. I adhered them together using glue dots and added a small yellow button to the center. I took the finished flower piece and adhered it to the knot of the bow with another glue dot. Super simple, but adorable!

I truly believe anyone would love to receive packages dressed up like this on Christmas day. Plus, they look so pretty under your tree or along your mantle.
Now it's time to head over to Holly's to see what she created for Day #1!
Make sure to check back here tomorrow for Day #2 of our Right at Home for the Hollydays series.
Nicole